Coming up rather quickly is the Bead Soup Blog Party hosted by Lori Anderson (actually, the first reveal is March 30...and that's me!)
While I can't show you my pieces (partly because they're not all completed) I can show you the new stitch I taught myself that will be a big part of my reveal.
I've seen lots of jewelry that's made with the RAW stitch (right-angle weave) and it always looked really complicated so I shied away from those patterns. But I found a pattern called "Hugs and Kisses" and I knew I had to learn how to make it!
This the same pattern, but using different size beads to create a completely different look.
I found a variation of the RAW stitch in Bead and Button September 2008, credited to Julie Glasser. It uses three different size beads to create a wave pattern in the design.
I started with these dreamy 8/0 pearl seed beads. They create the main color of the bracelet.
Then I dug around in my stash for these fantastic magatama beads. I found these in a little bead shop when vacationing in Maine (The Beaded Moose) and it was one of the times I bought beads with no idea of how to use them or any idea of what I wanted to do with them.
I finished off the color palette with these luscious green Delica 11/0 seed beads. Perfect for a spring creation, don't you think?
The pattern starts off by creating a string of RAW stitches with the 8/0 beads. Then you add in alternating 11/0 beads and magatama beads. The size difference creates the wave/rippling effect.
If you've never worked with magatama beads, be aware that they angle different ways depending on what side you pick up...Luckily I caught this when I did!
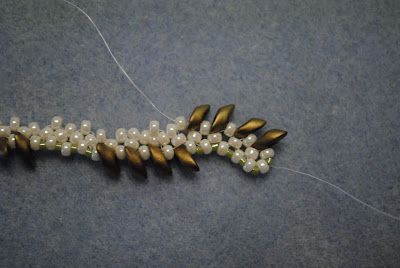
Here's the beginning of the second side. You can see how the wave effect is magnified with these great beads!
You have to be sure that there is enough tension in the string when you are weaving the outer rows so that the curves stay in place.
I added this antique bronze toggle clasp to finish the bracelet. I liked that the clasp has a geometric feel and that it and it pairs with the magatama beads so well.
So, now that I've successfully completed this project in my new stitch, it's off to start working on my piece for the big reveal!


No comments:
Post a Comment